
Setting up your class in Thinglink
Using Thinglink lets students create content and present their understanding in an engaging way. Here’s what you need before you can get started:
- your school needs a Thinglink licence
- you need to be listed as a teacher under this licence
- your students need student accounts and login details (you may need to set these up).
Check with your colleagues or school tech to see if your school has a licence and that you're listed as a teacher.
If your school hasn’t used Thinglink yet, find out how to start using it on the Thinglink apps page.
Creating a class group
A class group helps you see all your students' work in one place. When you click on a student’s name you’ll be able to see the media they’ve uploaded to Thinglink.
Here's how to create a class group:
- Select Home in the left menu.
- Select Organization from the cards on the screen.
- The page will open on the User tab. Select the Groups tab.
- Select the Create group button on the right of the screen.
- Name the group something relevant and select Create.
Adding students
If your students have used Thinglink before, you can add them to your class group with a class code or by searching and adding them manually.
For new students, you can generate account logins.
Adding students via class code
- Select the Groups tab in the Organisation page (Home > Organization (card) > Groups (tab)).
- Select and copy the Invite code for your group.
- Show the code on your whiteboard or distribute it to students.
Manually adding existing students
If your students have already used Thinglink and have accounts associated with your school, you can select their accounts to add them manually to your class group.
- Navigate to the Groups tab in the Organisation page (Home > Organization (card) > Groups (tab)).
- Click or tap the ellipsis for your group at the end of the row.
- Select Manage members.
- Click or tap in the Choose users box.
- Select the students’ accounts.
- Select Done when you've added all your students.
Manually adding new students
For students new to Thinglink, you can create accounts with their first names and last initial. You don’t need email addresses. Thinglink will then give you a CSV file (spreadsheet) with login details. Your students will need this information to log into their new accounts.
To manually create accounts:
- Navigate to the Groups tab in the Organisation page (Home > Organization (card) > Groups (tab)).
- Click or tap on the ellipsis next to the group where you want to add students.
- Select Add new user.
- Select the Manual creation tab.
- Enter your students' names, each on a new line.
- Select Create accounts.
- Thinglink will create and download the CSV spreadsheet – save it somewhere where you’ll find it again.
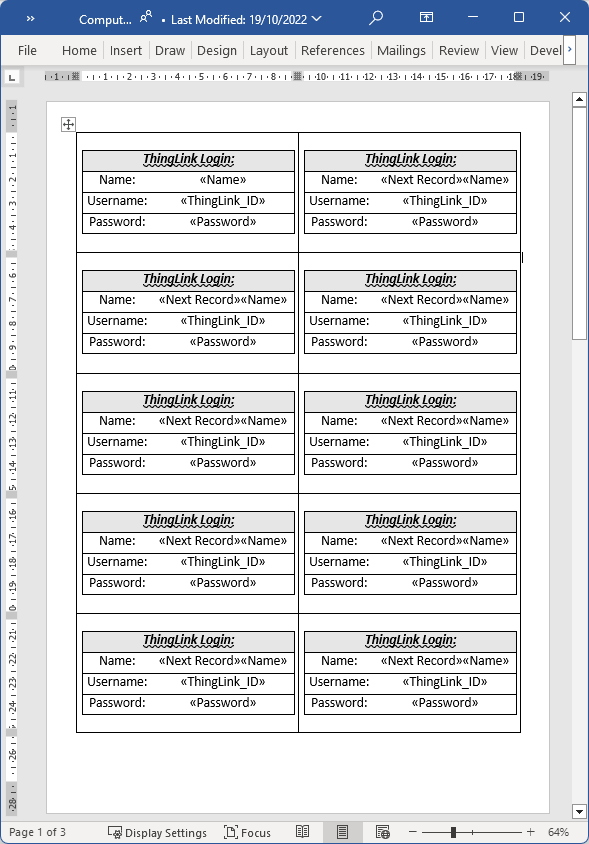
Creating login cards for students
When you add students manually, you'll get a CSV file with their details. You can make login cards from this using mail merge in Word. You can use this student login cards template (DOCX 30.9KB) .
Watch the video tutorial Thinglink: creating login cards for your students (2:51) or follow these steps:
- Open the student login cards template.
- Select No in the pop-up box that opens (about SQL demand).
- Open the Mailings tab and the Select recipients option in the ribbon – in the dropdown choose Use an Existing List….
- In the window that opens, find the location where you’ve saved the CSV spreadsheet with the Thinglink accounts you manually added (see previous section on this page). Select the CSV file and click or tap Open.
- In the Mailings tab, select Preview Results to check that all data has been merged correctly.
- Select Finish and Merge in the ribbon, selecting the Print Documents option.
- In the popup window that opens select All and OK.
- In the Print window that opens, change your printer to a PDF printer such as Adobe PDF.
- Select OK in the popup window confirming that the PDF has been created.
- Name the PDF and save it somewhere safe. Then print it on your local printer.
Give the cards to your students. Remind them to keep their login details private.
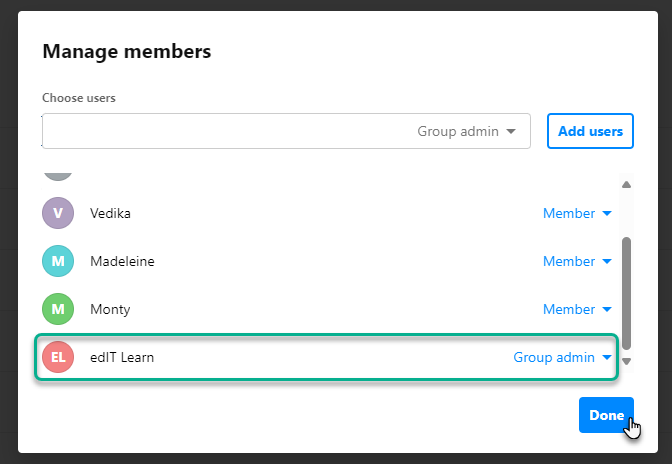
Adding another teacher
If you're working with another teacher, you can add them as a 'Group Admin' so they can access the students' work too.
Follow the same steps as for adding students (Home > Organization (card) > Groups (tab) > ellipsis (…) at the end of the row of the group > Manage members) but change the role from ‘Member’ to ‘Group admin’ before selecting Done.
Staying organised
Now that you've set up your class group and added your students, you can view their work and monitor their progress. Encourage students to use folders to keep their work and projects organised, making it easier for both of you to find their work.