
Tips for taking 360-degree photos
360-degree photos offer an unparalleled way to view and interact with the world. They provide students with immersive content that can serve as visual prompts to reinforce memories, establish common understanding or build knowledge. These photos can also empower students to creatively share their learning through virtual tours and 360-degree posters.
360 cameras are equipped with 2 fisheye lenses. They capture the entire surroundings in 1 shot, bypassing the need for traditional photography techniques. This user-friendly feature makes 360 cameras ideal for students of all ages and abilities.
Here are several tips to consider for optimal photo quality.
Useful accessories
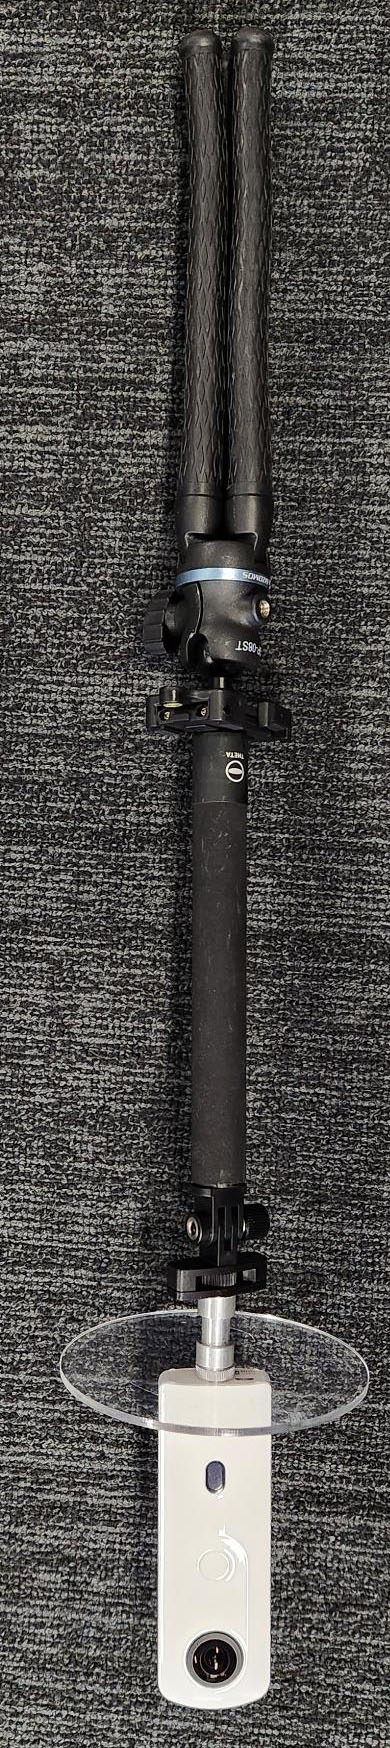
Remember to equip yourself with the necessary accessories to ensure the highest quality photos and to safeguard your equipment. For example, consider using a:
- Tripod
- selfie stick
- acrylic disk (for lens protection).
Camera positioning
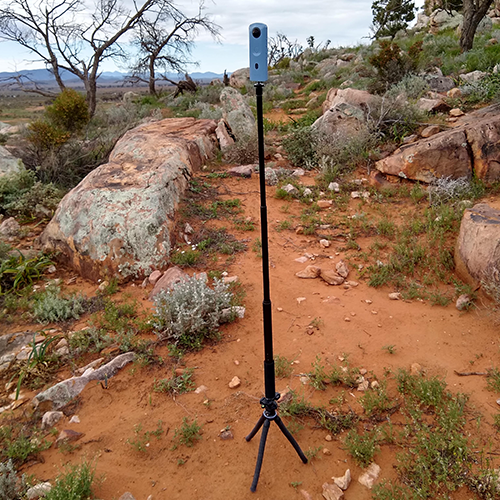
Strive to position the camera at eye level to replicate a natural viewpoint, unless you're aiming for a unique perspective such as a ground-level view for a unit of minibeasts. Use a small tripod with a selfie stick to achieve this height. Most camera software is designed to automatically exclude the tripod from the shot.
When setting up, position the camera in the shade where possible to avoid the tripod shadow being visible in your images.
Lens care
The fisheye lenses are delicate and prone to scratches. Always place the camera on its soft case when connecting to a computer.
When outdoors, consider using a clear acrylic disk larger than the camera with a tripod extension screw to protect the lenses if the camera tips over.
You can also use lens caps, though they may slightly diminish photo quality.
Creating empty scenes
To capture scenes without people, use the camera's timer function, which is a feature that students find particularly fun. Cameras like the Ricoh Theta SC2 have a 10-second timer.
Alternatively, you can hold the camera above your head or edit people out using software like Paint 3D or Adobe Photoshop.
360-degree videos
For viewer comfort, film from a fixed location rather than moving with the camera.
Given their large file sizes, keep 360 videos short and edit them with applications that support 360 formats, such as Adobe Premiere Pro.
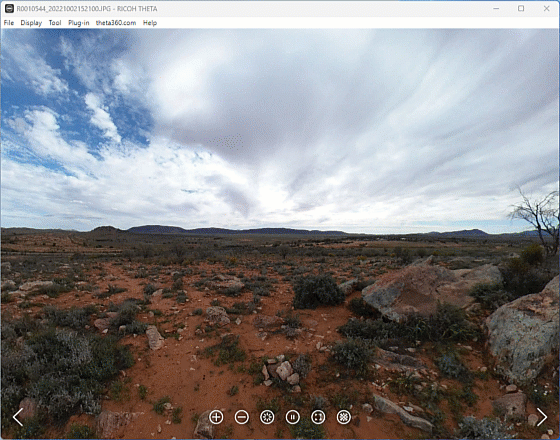
How to view your 360 content
Many cameras come with software for viewing on devices. You can also use third-party software. A few examples:
- The Ricoh Theta app can be used for viewing 360 photos on an Interactive Whiteboard in the classroom.
- Google Photos also supports 360 viewing.
- For projects like virtual tours, consider using an app like Thinglink, which allows for the addition of informative tags.
Related content: